Usage in Website Builders
Squarespace
Section titled “Squarespace”To use TypeIt on a Squarespace, you’ll need to find the features that allow you to inject custom HTML and JavaScript. Here are the high-level steps to do that:
1. Open up the page you want the effect to appear and add a new code block.
In that block, create an empty element that will serve as the anchor for TypeIt. For example:
<h3 id="myElement"></h3>
2. Navigate to the Advanced Settings section to find where you can inject code into the footer of every page.
In that textarea, paste the following code that will load the TypeIt source script and initialize your instance.
Note: If you don’t want to load the script on every page, you could also paste this snippet below the element you created in the first step.
<script src="https://unpkg.com/typeit/dist/index.umd.js"></script>
<script>
  document.addEventListener("DOMContentLoaded", function () {
    new TypeIt("#element", {
      strings: ["This is my string!"],
    }).go();
  });
</script>
Again, in order to use TypeIt with Wix, you’ll need to locate where you can inject custom HTML and JavaScript into your site. Wix has a “Dev Mode” that allows you to get fairly involved, but a simpler approach will look like the following:
1. In the website editor, hover over the “plus” icon, select “Embed,” and choose “HTML iframe.”
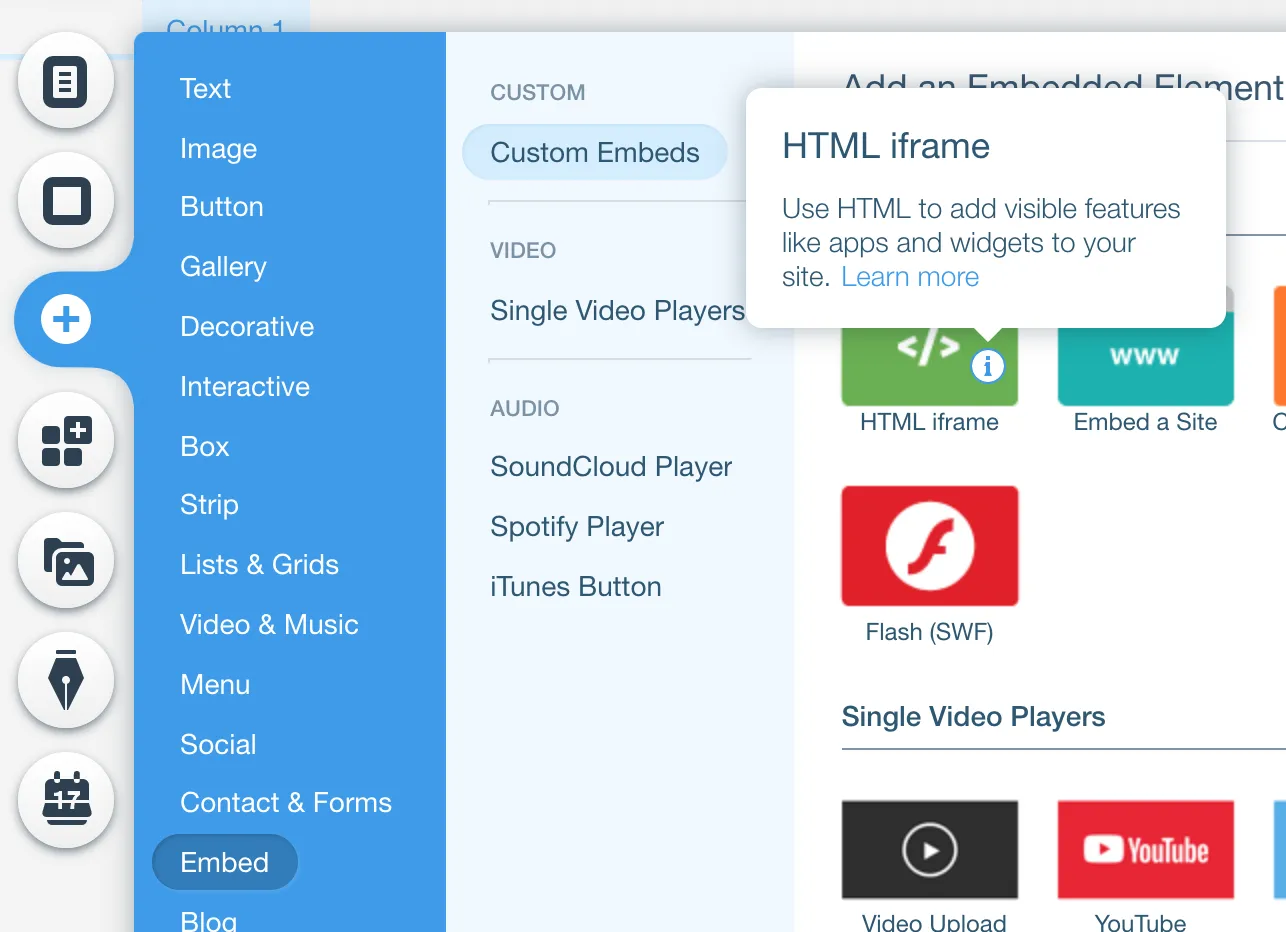
2. Click “Enter Code” above the box that appears, and paste the HTML, source <script> tag, and your initialization inside the textarea.
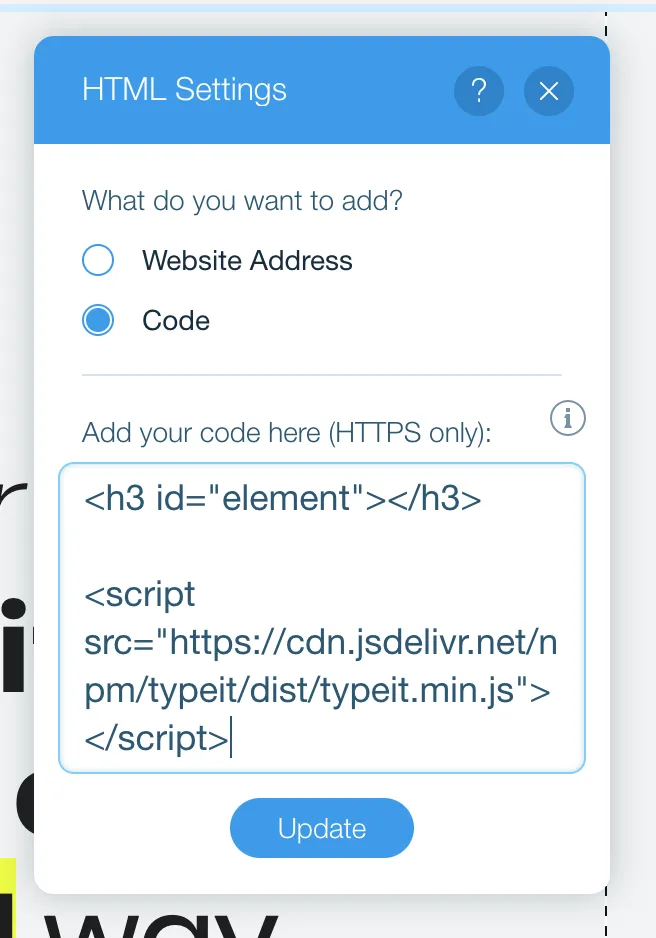
What you paste into that box must look something like this:
<span id="myElement"></span>

<script src="https://unpkg.com/typeit@@{TYPEIT_VERSION}/dist/index.umd.js"></script>
<script>
  new TypeIt("#myElement", {
    strings: "This is what will be typed!",
  }).go();
</script>
For more information on this, dig into Wix’s documentation on adding custom code to your site.
WordPress
Section titled “WordPress”For use within a WordPress site, it’s recommended that you leverage the WordPress plugin for TypeIt.